


Intro
Recently I posted two sample projects of a Captivate tutorial which is a Training simulation. If you didn’t watch them, click the links:
- First version is showing the default software sim slides, where each captured slide covers the full slide. Those slides all use the Blank Master slide, whatever the used Theme. Narration is used to give instructions.
- Second version has the same slides embedded in bigger content slides. The extra space is used to show logo and text containers including instructions.
This comparative screenshot for one of the sim slides shows the difference:
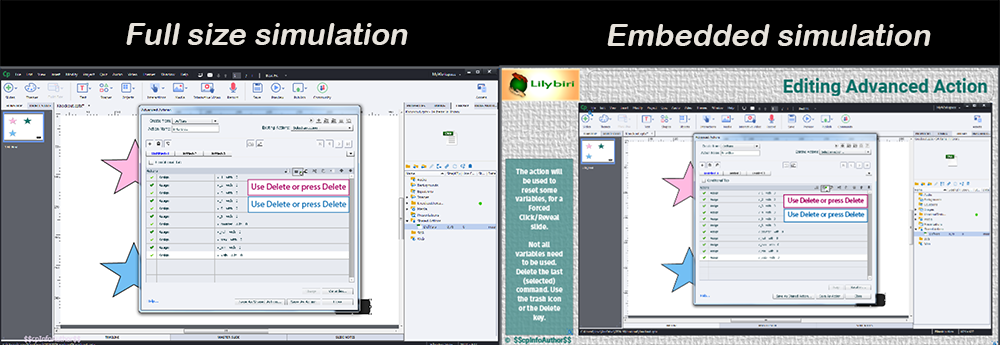
This blog offers the step-by-step workflow to create and use a master slide for the embedded sim slides in the second version.
Setup for Embedded sim slides
For this example the simulation slides need to be embedded in a project with a resolution of 1280×720 pixels. The captured slides were created with a resolution of 1600x900pixels, which is larger than the final resolution.
To embed the sim slides, they need to be rescaled. If the original simulation slides have the correct resolution ready for embedding, you can skip Step 0.
Step 0 in Captivate (only if captured resolution is not correct)
Rescaling the software simulation to 2/3, which leads to a resolution of 1066x600px. You choose the resolution needed for your project, but keep ‘Maintain Aspect Ratio’ and ‘Rescale all objects’. Those are the default settings.
Step 1 (in Photoshop or other app) – create the Knockout image

Step 2 (in Captivate)
- calculate the difference between the widths of the vertical bars: 200 – 14 = 186 pixels
- new width project will be 1066 + 186 = 1252 pixels
- calculate the difference between the heights of the horizontal bars: 90 – 30 = 60 pixels
- new height project will be 600+ 60 = 660 pixels
-
deselect ‘Maintain aspect ratio’ and introduce the new dimensions
- under ‘New Size is Larger’, select ‘Keep project the same size and position project Bottom Right; I choose this because the bottom bar and the right bar have the smallest dimension; you can choose another option if your smallest margins are elsewhere.


Step 3 (in Captivate)
- deselect ‘Maintain aspect ratio’ and introduce the final dimensions
- under ‘New Size is Larger’, select ‘Keep project the same size and position project Center


Step 4 (in Captivate): Master slides
In the original blog post it was possible to create a master slide which is partially transparent, but that is no longer possible in the present versions with the Themes (new since Captivate 6). Here is the master slide panel, where you see some master slides of the custom Theme ‘Knockout’ which I created:

I used the two imported PNGs from the Photoshop file to create:
- The Main master slide, where the FullTexture image is set as background image. You see the setup in the Properties panel:

- Based on that Main master slide, I created some content master slides. You see acouple of them in the master slide panel above (Title, Light). The Blank master slide always has to remain Blank, it is not using the Main master slide.
- The Knockout master slide. You cannot use the KnockoutTexture image as was done in the Main master slide, it needs to be a separate image as you can see in the Timeline and in the Properties panel. I added some objects and placeholders:

Step 5: Apply Knockout to simulation slides

Up till now the simulation slides used the Blank master slide. Change the master slide to the Knockout Master slide. It is very important that you do NOT check the option ‘Master slide objects on top’, because you’ll lose the textured parts of the image
.
The post Workflow to embed Software simulation slides. (Knockout master) appeared first on eLearning.
Step-by-step workflow to create and use a Knockout master slide to embed software simulation slides in bigger content slides.
The post Workflow to embed Software simulation slides. (Knockout master) appeared first on eLearning.Read MoreBlog, Screen Capture, Software simulation, blog, Embed, Master Slides, Rescale project, screen capture, software simulation, theme, training simulation